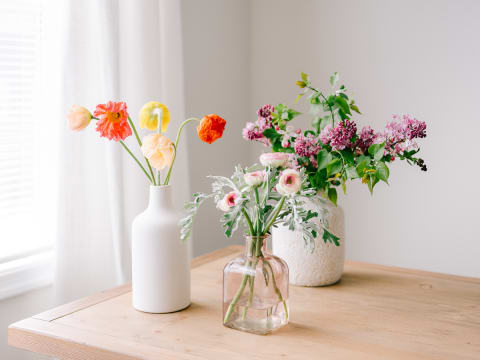
Not sure where to start? We called up Emily Thomason, a florist at Devynn’s Garden in California, to put together this guide to the basics of bouquet making. Buying from florists tends to be a better bet than from a grocery store, as their flowers are usually fresher and will last longer. To stay on track and on budget in the store, look for these categories for your bouquet: Clear off any leaves that will be sitting in water, and give all your stems a quick snip at an angle before laying them on a clean arranging surface. This will free up some surface area for them to drink from and help them last longer. Those who are working with shallow, wide-mouthed vases can use floral foam or bowl tape to help keep stems secured in place. Both tools can be found in most flower shops and are easy to work with. If you’re using the waterproof bowl tape, make a grid pattern on the mouth of your vase. This will create a little pattern for your flowers to lean on and make arranging much easier and less frustrating. By the time the arrangement is complete, it should be full enough to hide the tape underneath. The floral foam serves a similar purpose: You cut it to fit your vase, soak it in water, and place your stems into it. “It acts as the water source for the stems and it will help things stay exactly where you want them to be,” Thomason says. Dark-colored vases tend to be better for foam, as it will be visible through glass. Thomason recommends always starting by placing your greens: “That’s going to give you a base and help it all stay together and stay up,” she says. With that foundation in place, you can add your line flowers and filler flowers, then your statement blooms. Bouquet arranging is more of an art than a science, so Thomason’s advice here is just to learn as you go and get to know your arrangement. Eyeball what colors and textures you think look nice together, and cut some stems shorter and keep others long for a more layered look. Remember: You really can’t go wrong with such stunning materials, so just have fun with it. If you have an idea where your finished bouquet will go, that can help shape your arrangement too. If you think it will be placed against a wall, for example, you can get away with only arranging half of the bouquet. “In that case, you’d want to put greens standing up on one side and acting as an anchor for the back,” Thomason says. “You can make the front really shine because that’s the moment you really need to focus on.” If your arrangement is likely going on a table or counter, spin it as you go to make sure you’re seeing it from all sides and angles. The key with dried flowers is to use an extremely light touch: These babies are fragile! Some of your flowers will inevitably fall off during the arrangement process, but being gentle can help keep more of them intact. Emma received her B.A. in Environmental Science & Policy with a specialty in environmental communications from Duke University. In addition to penning over 1,000 mbg articles on topics from the water crisis in California to the rise of urban beekeeping, her work has appeared on Grist, Bloomberg News, Bustle, and Forbes. She’s spoken about the intersection of self-care and sustainability on podcasts and live events alongside environmental thought leaders like Marci Zaroff, Gay Browne, and Summer Rayne Oakes.